If you have iContact instead of Mailchimp, see her post: Adding iContact To Storenvy
Get Where You’re Going
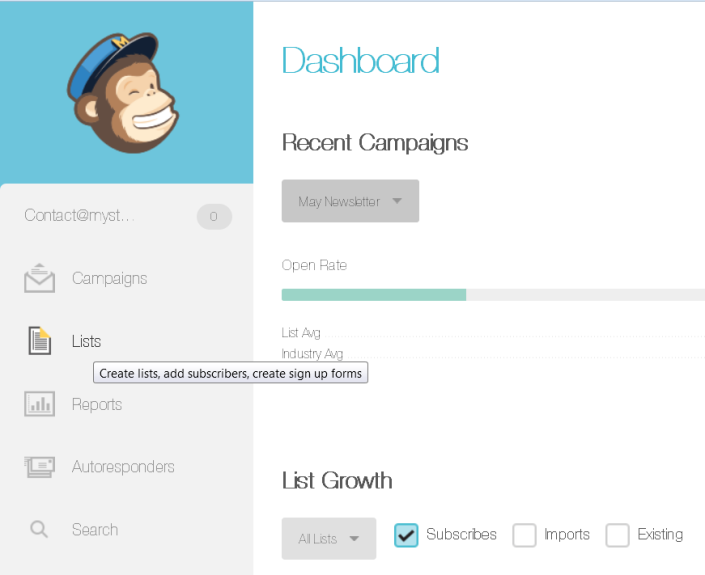
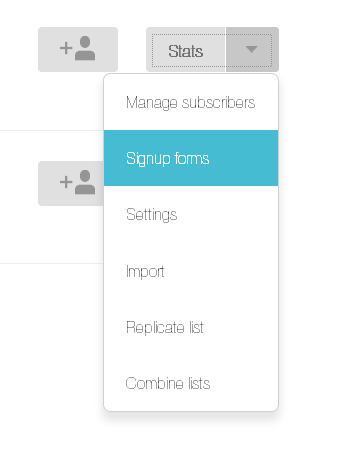
Log in to your Mailchimp dashboard. Select “Lists” from the menu – it’s the second option.Click the arrow next to Stats and then choose “Signup forms”
Then you get to this:
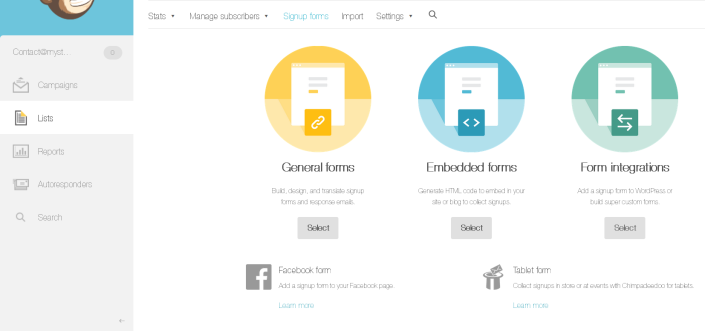
Lots of options, right? You will select “Embedded forms” to work with.
Make It Up
From here, you get to make your form all pretty! I use Classic, but if you’re looking to use less real estate on your page, pick Super Slim. Just remember that you can only have a required field for an email address for Super Slim to work, so you can not require subscribers to input their name if you use that option. Naked works too, but you’ll definitely have to play with CSS for that.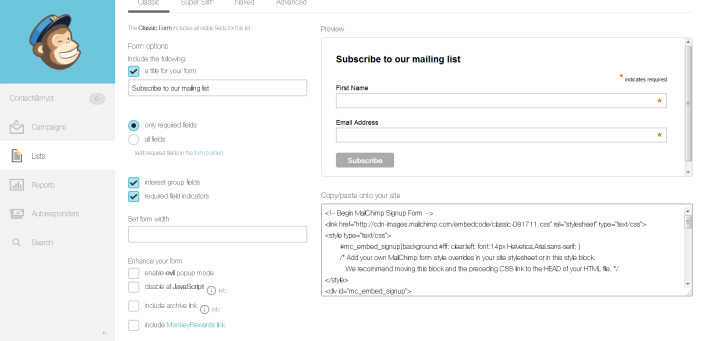
Got it all prettied up and ready to install? Awesome. Don’t worry if it’s not exactly how you want it because you can tweak appearances with CSS once it’s on your Storenvy site.
Drop It In
Now, select all that lovely gibberish in the lower right hand box (pictured above) and copy it. Toddle on over to Storenvy and log in. From your dashboard, select Design, then choose “Pages” or “Edit HTML” as either one brings you to the same place.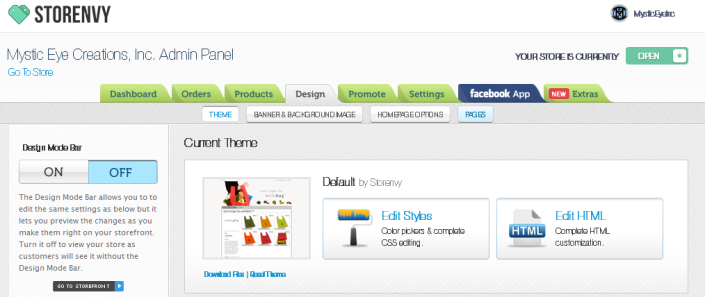
From your Page Templates list, select the type of page you want it on.
Layout will add the form to every page in your shop, like I’ve done & would recommend so each page has a call to action to join your mailing list.
Home will add it to only the home page of your shop.
Contact or FAQ are also good places for a signup form.
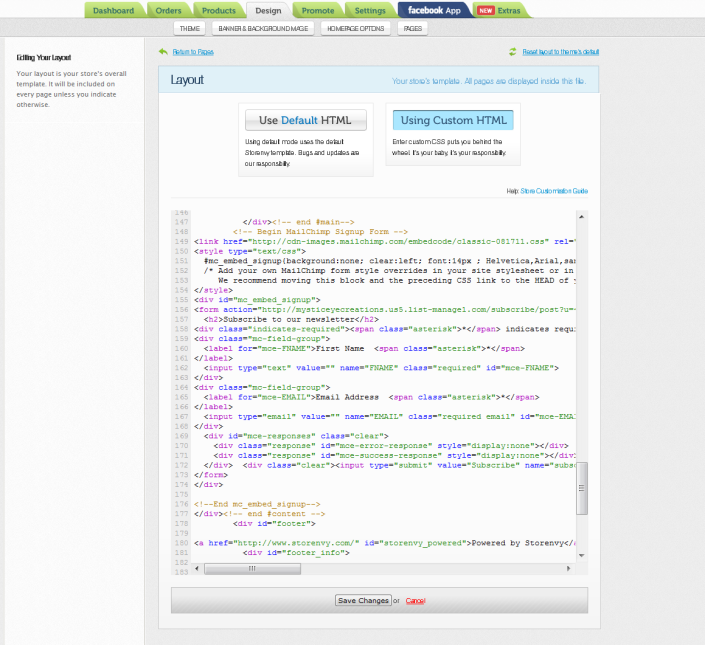
Once you've selected the template you want, choose “Using Custom HTML” on the right to show the page code. If you don’t know HTML don’t get too scared – if you mess up there’s a reset button in the upper right so you can set it back - but if you reset you will lose any customization you have built into your Storenvy shop, so be sure to save a back up file of your code if you are worried about installing the code yourself.
Place your code where you feel it will work best. Most sections have little notes about what they are (thank you, SE team!). If you look at the picture, I’ve pasted my code immediately after the <–! end #main –> indicator so that my form is at the very bottom of each page.
Hit Save
That’s it. Really. Unless you want to go to the CSS and add some fancy stuff there. You don’t need to, though. Especially if you really gussied it up from the MailChimp panel.Enjoy! If you have any questions hit Tanya up on Facebook or Twitter!

Thanks so much for this post! I did some extra customization to match my background color and font and it looks great :) Nice thing to add to the shop!
ReplyDeleteI had a question, i followed your instructions (thank you!) and signed up to see how it would look, it is showing my address when people sign up, is there a way to fix that? i don't want people knowing my home address, thank you!
ReplyDeleteSarah
Unfortunately, anti-spam laws require an address at the bottom of the newsletters - you can just put your street name and city, state and zip though!
Delete