Showing posts with label business. Show all posts

How I set myself up for success with a functional to-do list

I have always hated to-do lists. I don't know why but the second I would write anything down I would be loathe to actually do it. Then I realized creating an effective to-do list is all about prioritizing my daily, weekly & monthly actions so I am steadily working towards my long term goals, not listing 238936498273817291279 things & crying when I can't do them all. 

I want to start out saying that schedules (ie, "Coffee with Mel at 6pm Tuesday" & "11am PAT meeting") & my (most likely whacked out) version of an effective to-do lists are two totally different things. I'm not saying itemized schedules aren't great for keeping things running smoothly, because they totally are, just that schedules & to-do lists are so easy to confuse and I think that is why me & so many people balk when they look at their to-do lists.

So I figured with January being all about organization & goals, it would be a great time to share my three tips for creating a functional to-do list that I actually enjoy. I even made a very easy to use to-do list printable that forces me to really prioritize my weekly & monthly actions & you may find useful, too, so you can get your copy here here then read on to find out how I use it to set myself up for success!

Set easily attainable long-term goals

I used to think that to-do lists were just a list of the day to day stuff you need to get done and as soon as I put every little thing on my to-do list I would start feeling super stressed out. Then I one day I just had this epiphany - I don't need to write down things like "answer emails". I have a block of time set aside every morning and afternoon just for that. It's not like I'm going to forget to do it, it's part of my daily routine. Putting it & all my other daily actions on my to-do list was totally unnecessary.

Then I was like, wait a minute, have I been doing this wrong this whole time?

That's when I figured out that to-do lists work best for me if I define long term goals are. When I know what I'm working towards, then I feel like I can set up a concentrated action plan broken down by months/weeks. Now I am a to-do list making monster! (Pun totally intended, hehe!)

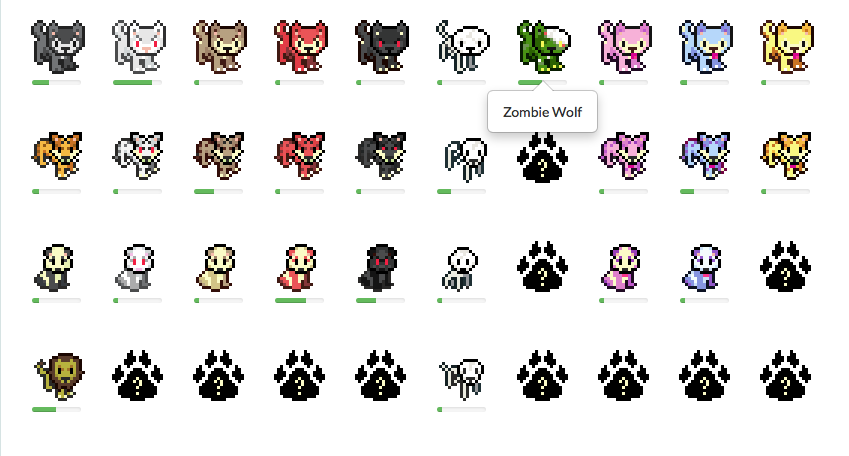
Here's one of my long term goal for this year!  I'd  love to make 500 monsters next year, but set my actual production goal for 450 monsters. I like to call this "setting myself up for success".

To set myself up for success, I only set long-term goals I know I can make even if something unexpected occurs. The same must be done for the items I put on my to-do list. 

I found that setting realistic goals each week/month on my to-do list that all work towards the long-term goals is super empowering! Realistic doesn't mean not challenging - it just means I know my own limits and allow for some wiggle room. Plus, when you set realistic goals that you can meet & exceed, you can celebrate with a little wine & chocolate or beer & burgers, whatever is your preferred method for celebrating your own awesomeness. And who doesn't need more reasons to celebrate in their life?! 

Break  long-term goals into bite-size bits

After realizing a to-do list is a tool to use to help prioritize the actions I need to take to achieve the long-term goals I set rather than an itemized list longer than my arm of things like "email Sydney, Peter, Paul, Tanesha & Simone" or "Check Facebook messages" or "records daily stats", breaking up my long-term goals into smaller bits (AKA, to-do lists) became a lot more tolerable. I break the individual actions needed to achieve the long term goal down into monthly and weekly to-do lists. For instance, my goal to reach 450 monsters may seem huge. But with a little math to break it down, it becomes a much less daunting task! 

To create my monthly goal, I divide my total number by 12:
450/12=37.5
To create my weekly goal, I divide my total number by 52:
450/52=8.65

So I know that each month I need to produce around 40 monsters in order to reach my goal. So each week I need to make around 10 monsters. So now my to-do list is super simple - weekly, make about ten monsters. Monthly, make about forty monsters. I know, it sounds stupid simple. But this simple method keeps me focused on what I hope to achieve for my business & always working towards it.

Ten monsters a week is SO doable. Some weeks I even make 20+ monsters. So even if I catch the flu and miss a week of work, catching up is not unrealistic. And boy, one thing I have learned is setting goals you can meet even if something catastrophic happens is super important because life happens. Take all those things you don't plan for and plan for them when setting goals. Your car breaking down, your water heater breaking, catching a bad stomach virus or the inevitable winter cold, make sure you consider these things when you are setting your goals so even if you miss several weeks of work here and there through the year, that you will still be able to meet your goals. 

Only put the must-do's on the to-do list.

The thing that stressed me out the most was putting want-to-do's on my must-do to-do list. It did nothing besides create unnecessary stress. Must-do's include sending payments, responding to important emails, working on your line sheet for wholesale clients, production goals, etc. Want-to-do's are things like "go to the craft store" (unless I absolutely totally need something, of course) & "pick up new gold monogram mug from Target" or even "join a community for makers this week" - that doesn't need to be on my to-do list, because it doesn't bring me any closer to my goals. Those would all go on my want-to-do list.

What I do is order items that MUST be done at the very top for must reach goals. Once I check those off my list, I reward myself by completing some want-to-do's! All want-to-do's go lower on the list (or not on the list at all if there is paramount must-do's that need doing), and my want-to-do's also have much smaller goals so if I complete all my must-do's I'm not balking at 57 more things on my want-to-do list.

So, in short, before I put a ton of items on my to-do list, I step back & meditate on my long term goals. I make certain that my daily, weekly & monthly actions are continually bringing me closer to these goals. By doing this, I found other items falling off my to-do list because those actions didn't support my long term plans & were stressing m out for no reason. And when we stop focusing on actions that aren't helping us grow, we are more likely to thrive! 

I created this fun free printable to-do list to help define my must-dos and want-to-dos while always keeping my long-term goals in sight. There is both a color version and a black and white version you can choose from if you want to download your own to try out! 


A clever way to use this list without having to print a million & one copies of it is to print a single copy and write your yearly goal in the left box, then put this pretty to-do list in a picture frame. Use a dry erase marker to update your monthly and weekly must-do's and your weekly want-to-do's!

20 Tips for Writing PDF Patterns

This post originally appeared on Things for Boys. Abby is so sweet & offered to share this great advice with Daft readers, too! 


I love that there are so many indie pattern designers around these days. Modern day makers are really spoiled for choice! You can find patterns and tutorials to suit any taste to make almost anything you want.

A lot of bloggers who like to sew are turning to designing patterns as a way to explore their creativity and earn a little income from what they love to do. It’s always great to see an idea you have in your head come to life! It’s even more exciting when you see other people making them too!

I have one pattern for sale, The Big Tote Bag and another pattern in the works. I have used a lot of PDF patterns… some were great & equally, some were not so great. If you’re thinking of writing a pattern, I wanted to share my tips & experience as both a designer & consumer for creating good quality PDF patterns that are easy to follow. 

1. Use a plain, easy to read font. Save the fancy fonts for your cover page. Also, use standard left alignment. Centered text alignment can be harder to read.


2. Group your steps into logical sections. This can be tricky, but the more prototypes of your pattern you make, the better idea you get. Try to group things like all the pieces that need top stitching together so that those using your pattern won't need to be changing threads so often.

3. Number each step. If anyone ever needs to email you with a question, it’s much easier for them to say ‘I’m lost on Step 5 in Section 2′ than ‘I’m trying to insert the placket and I don’t understand the bit where you fold it through’. Numbering your pages also helps.

4. Clearly lay out each section. Keep it ordered neatly with the steps next to their photos and leave a bit of white space between each step. The white space makes it easier to read and is handy for adding annotations.

5. If you’re using abbreviations, make sure you use the full term the first time & list them in a glossary. Just because you know that RST means ‘right sides together’, it doesn’t mean every one does.

6. Include hyperlinks to techniques. These can be helpful where you don’t want to explain a technique or you feel it should already be known by the user.

7. The more prototypes of your item you make, the better your pattern will be. You may find a better way to do something the next time you make it or you may pick up a simple mistake in your instructions or pattern pieces. Also read your steps as you are sewing through & ask a friend to proof read your patterns as well. You’ll be amazed what you may notice - missing words, extra letters… all these things that our brains fill in for us, especially when we've read something so many times.


8. If your pattern includes printable pieces, make sure you include a printing test square. This square can be measured up so that the user knows the pattern has printed out the correct size. Many times I have printed out a pattern, stuck it together, cut out the paper pieces and then thought, I should check the test square, and guess what, it was wrong! Thankfully I hadn't cut into my fabric. A quick reprint, making sure no page scaling was set in the options and my pattern was perfect! If the test square wasn't there, I would have no idea if my pattern was wrong and would have wasted my time and fabric making something that was never going to fit.

9. Include full size pattern pieces. There is nothing more annoying than printing out a pattern and then realizing the pieces need to actually be printed at 200%. I don’t even know how to do that!

10. Make sure your pattern pages will print on both A4 and US Letter sized paper. These papers are different sizes and there’s nothing worse than printing it all out to notice that the sides (or tops) are chopped off and your pages are useless. Also remember that you can’t print all the way to the edge of a page. Keeping your pattern pieces within 19 x 25cm (7.5″ x 10″) should ensure that your pattern pieces will print on most printers.

11. Include grainlines and notches on your pattern pieces and a pattern layout diagram in your instructions! These are one of the things you find in the Big 4 patterns that are missing from a lot of PDF patterns - and they are so helpful!

12. Put your pattern name, logo &URL on every pattern piece if you can. It’s so frustrating finding a rogue pattern piece on the floor during a clean up and having no idea which pattern it belongs to. This is also helpful because then people can remember where they got the pattern & recommend your patterns to friends!

13. Include a large format/copy shop version of your pattern. I’m so excited that designers are starting to include these with their patterns. For just a couple of dollars you can print out the pattern at the print shop…no aligning and sticking taping of pages needed! Also, this is more personal preference, but I don’t think it’s a good idea to overlap pattern pieces. The beauty of a PDF pattern is that you can just cut the pieces out of the paper and not bother with tracing. But when the pieces are overlapped (the lines of one pattern piece go over/intersect another, think Burda Style or Ottobre) then it needs to be printed out many times or traced off the PDF).

14. Use contrasting thread when stitching for the pattern photos. It makes your seams and stitches much easier to see in any photos. I have used white thread with blue fabric in this tutorial. Much easier on the eyes than a matching thread color.

15. Choose your fabrics carefully. On some fabrics the right side and wrong side look the same, which can make your instructions confusing. Try to pick a fabric with an obvious right and wrong side. Patterns on fabric can also make photos and instructions confusing. Fine stripes can be a real problem.

16. If you feel your photo may not be quite clear enough, feel free to add arrows, lines or notations to help get your point across. These can be done in fancy programs such as Adobe Illustrator or even just in MS Paint. You can see how much easier the image below is to understand with some measurements on it.


17. Use lot of images! Many people prefer to learn visually and including step by step images can make some confusing instructions crystal clear! You may also find that diagrams and drawings are better than pictures in some cases.

18. Test out your instructions by printing them in black and white. I also print mine out ‘2-to-a-page’ (at 50%) to make sure that they are still easy to understand when small. If they look good like this, then you know they will be easy to read if someone prints them out black and white (I only have a black and white printer at home) and also if viewing them at a reduced size on a mobile device.

19. Make your pattern cutting lines different. And not just a different color, but patterned too. Making each line style different  makes each size easily distinguishable when printed in black and white, not just colour. There’s a great example in the test square photo above.

20. Get the pattern tested - more than once! I cannot stress this enough. Your instructions make make complete sense to you, but could be very hard for someone else to understand. If your pattern is simple enough that you don’t think the pattern itself needs testing, at least have the instructions proof read by someone who knows how to sew - as well as someone who doesn't, to make sure that they are clear enough for even a novice level sew-er to understand!

21. Bonus tip! If you’re want an in depth course showing you in great detail how to create PDF patterns using Adobe Illustrator, then I can recommend Lauren’s course over at Pattern Workshop. It’s very comprehensive and Lauren has a great teaching style.

connect with Abby

Do you frequently use PDF patterns? Have you got any tips to add? Anything that drives you nuts in PDF patterns? Let's chat about it in the comments!

How to Filter Your Own Views Out of Google Analytics Reports

Today's guest post is brought to you from Toni of Little House Of Crafting.

Most shop owners visit their own store frequently when working on the design, checking listings & just to bask in it's beauty sometimes. However, visiting your own store will create inaccurate traffic data on Google Analytics, which is a great tool for data analysis in your shop. Toni from Little House of Crafting has whipped up this great tutorial for removing your own clicks from your data for accurate reporting.


You can find filters in the Admin panel of Google Analytics.


Click on the red +New Filters button.


Now you just give your filter a name - I chose "Exclude IP" - and select the filter type Custom. Then select the filter Field (IP Address) & filter pattern (your IP address). You can find your IP address using this tool here.


Make sure to put a backslash (\) in front of the periods. If your IP address is 112.41.251.122 put 112\.41\.251\.122 in the Filter Pattern box.

Hit Save and you're done!

If you use different computers make sure to make a filter for those IP addresses as well so that your Google Analytics reporting is accurate!

connect with Toni

5 Ways to Make the Most of Winter Slowdown

It happens to almost everyone, every year (And if it doesn't happen to you, give yourself a pat on the back because you are killing it!). 

Of course, I'm talking about the:


The Winter Slowdown


Dun dun dun! Most makers spend most of December scuttling around like crazy with holiday orders & post office runs & most likely late nights in the studio, screeching to a halt right before Christmas. 

And then the New Year gleams on the horizon! So much opportunity! So many possibilities! This is the year for your business! 

But then you remember how broke most people are after the holidays. Plus they just got like eleventy billion new things to fill their home up with over the holidays. Shopping is usually the last thing on their mind unless you are having a massive 70% off post-holiday sale. Which usually means January & February are pretty slow months for many makers, resulting in what is known as this dreaded Winter Slowdown when sales are record lows or sometimes, non-existent.

It can be disheartening to go from booming business to hearing crickets in just a matter of weeks. It can lurch you into a slump & make you want to curl up in your pajamas and binge watch the latest hit show on Netflix while you eat obscene amounts of extra butter popcorn (No? Just me?). Well, let me tell you what I've learned from five and a half years of running Lu & Ed

Resist the urge to hibernate. 

Seriously. This is your time to shine, baby! Or at least to take a running leap into the New Year, that is still gleaming with opportunities & full of so many possibilities - and now is the time to put in the work to make your dreams for 2015 a reality! Here is how I make the most of the Winter Slowdown:

1. Do your taxes. 

Ugh. The dreaded T word. But use these quiet days at the beginning of the year to get your books in order, file sales tax for your state (most states are due by February 2nd. View a full list of sales tax due dates by state here) & get everything ready to file or pass over to your book keeper. Seriously, it's the boring hate-to-do work but the sooner you get it done the sooner you can get back to the fun parts of running a business!


2. Do a year-end review.

Take a look over your numbers for the previous year. I wrote about my year end review here. Sales, traffic, social media growth. Create charts, numbered lists or whatever helps you analyze this data to find out what content resonated best with your audience, what products were your best sellers, what marketing tactics worked, which social media platforms performed best and where you spent a lot of time that had little return on investment. Use this data to focus your energy in the New Year to determine what you should be researching and experimenting with to take your business to the next level & to weed out websites, social media accounts or actions that don't yield positive results.


3. Tidy up your studio

Whether you use a corner of a coffee table or have an entire room to use as your studio space, take some time to tidy up, organize & rearrange if needed. Clean spaces inspire creativity!

4. Build inventory

You know what would be awesome next year? If craft show season/the holiday season wasn't so darn crazy!

I always use January as a time to build loads of inventory so that I start the year off with a surplus of products for stockings, shows & sales. It feels great to start the year off churning out new designs & products and building hype & excitement with your audience, plus it gives you some cushion as you go into the busier show & sales seasons meaning a lighter workload later on in the year. Work smarter, not harder & save yourself some stress later in the year by generating lots of inventory during the slower sales period when you have ample time to dedicate to it.

5. Treat yo'self! 

Once your business is New Year Ready (taxes filed & permit fees paid & so on) use the slower months to take some time for personal projects, treat yourself to a hair cut or some shopping, take a few naps or any other activity you usually can't enjoy during your busiest seasons! Enjoy the coziness of the slow season & make time for coffee with friends! Feel free to schedule a week off to just relax, visit family or binge watch that show we talked about - but make sure to set a day to "come back to work" so to speak (so that you don't get sucked into the next season of that show) and commit to starting the year off productive & actively chasing those opportunities on the horizon! 

How do you make the most of the winter slowdown? Let's chat about ways to stay productive while enjoying the coziness of the winter slowdown!

My year-end review using Google Analytics

Do you review your year end traffic via Google Analytics to see where your marketing had the most return on investment (ROI)? It can be incredibly beneficial in planning out your marketing game plan for the new year! 

If you aren't using Google Analytics yet, get that stuff set up ASAP! If you aren't sure how to set it up with your online shop, do a quick Google search for a tutorial. This data is a powerful tool & by understanding how people are finding your site, which sites they purchase from and which sites bring you the most revenue, you can use those numbers to launch your business to the next level! When doing my year-end review, I look at everything but really only analyze three things: revenue, conversion rates & traffic sources. 

Why these three? 

Because to me, examining these three statistics helps me figure out:
  • What I did right in the previous year
  • What worked for my business
  • What didn't work for my business
  • Where I should be investing my precious time/effort/hard earned marketing money
To give you a better sense of what kind of goodness you can divulge from these statistics I am going to share a peek at my year in review as well my top three sources in each category! I invite you to explore your own. You may just be surprised by how the stats stack up! Like me, you may just find that all that time you spend in those Facebook groups really is just a waste of time - it may be bringing you traffic, but if if has a low conversion rate or doesn't rank high on your sources of revenue, you need to either reevaluate how you spend you time on that platform, create a new marketing strategy or ditch it altogether to focus on what does bring in the buyers!

First up, head over to Google Analytics and select the time frame from January 1st of the previous year December 31st of that year in the top right hand corner. Now get ready to dig in! 

Revenue
To access this data, click Acquisition>All Traffic>Source/Medium, then select Revenue in the right corner below the graph. To view the graph, click the highlighted drop down menu & select "Revenue".

When I look at what brought me the most revenue in my monster shop during the previous year - and what brought me the least - I can spend my precious time & hard earned money better in the next year. I can also use this data to determine slow times where maybe I could put in more effort marketing. On the chart above the spike in March was because it was my last stocking before a big show in April, which accounts for the dip, and the dip in July was because we were on vacation most of the month & I only did a small stocking that month. September is always slow for me - end of summer vacations, back to school expenses, extra-curricular fees & and all that other fun stuff usually sucks all the extra spending money out of parents, who are my target audience. 

Using this data I can also discover things like if paid ads on blogs had little to no ROI & then I will just save that money instead of renewing the paid ad. If a blog post someone did on my products brought me in loads of revenue, I would know I should collaborate with that blogger again. See how I can use that data to grow my business & weed out things that aren't helping it grow?

Here are the top three sources of revenue for Lu & Ed last year. 

1. Direct traffic. The term “direct” loosely means no referrer, so they came to my site on their own accord, basically, either through a book mark or typing in the URL.
2. Instagram. I spent all of last year experimenting on & researching this platform & am so glad to see that all that effort paid off!
3. Facebook - but with Instagram bringing in several hundred more dollars in revenue than FB. 

Traffic
Click Sessions while on the same view as above to see your traffic sources. Click the drop down box & select Sessions to view as a graph. 

It is so good to know where people are coming from, how they are finding you & what platforms you are marketing on that is bringing people to your site - and it ties in directly with the conversion rate info, helping you to know what sites you are spending time on but don't have much in the way of ROI. 

My top three traffic sources: 

1. Direct traffic accounts for 41.39% of ALL traffic & 50.1% of new users coming to my shop for the year of 2014! 
2. Facebook 
3. Google, with Oh My! Handmade Goodness following close behind! :) 

Conversion Rate

To view this data, click the far right option for Ecommerce Conversion Rate to sort source sites by conversion rate. Select it from the drop down to view as a graph.

More important than knowing where people are coming from is knowing where they come from that results in the most sales. If you don't know what a conversion rate is or don't understand why it's so important to your business, I highly recommend this post from Aeolidia: Improving Sales by Understanding Your Conversion Rate. Basically, I use this data to determine which site turns more browsers into buyers. By knowing this, I know where I should be focusing more energy. The dips seen in the graph above in April is because I had a show that month & I barely had any inventory in my shop. The dip in July is because I was out of town for most of the month & only did one stocking that month. 

Top three sources of traffic with the highest conversion rates:

1. Direct traffic leads again (strongly). Seeing this as the number one for all three items makes my heart so happy - it means that I am on the road to building a strong brand & web presence! 
2. My email list. I launched my campaign at the beginning of last year & it already accounts for 28.7% of total sessions on my website!
3. Instagram. Again, yay!

Quick example of how to use this data

So, let's take a peek over these charts & stats above. Notice that Facebook may have made the top three for traffic, it didn't make the top three (or ten, even) for conversion rate? It may be bringing people to me, but they aren't buying. Why is that?

For me, personally, it's because I started the year in several Facebook groups. I quickly realized after reviewing my stats for the previous year that while a group may have 12,000 members, that doesn't mean it will do jack for my business. I could share a product & get 59 comments, but not a single purchase - because other makers are not my target audience. Over the Spring I made adjustments to how I marketed - and saw a huge increase in my total conversion rate! You can see how it sky rocketed from 1.38% to over 3% in a matter of months from January to March when I started making the switch in how I marketed & where I invested my time, thanks to my stats from the previous year. 

So here's the low down: If one site is bringing you traffic but not sales, ask yourself why. What could you do differently? Is it worth the effort? Could you better spend the time/resources on a site that brings in more revenue or has a higher conversion rate?  

Do a little homework. Once you pull up the Analytics for 2014, write down what brought you the most revenue, the most traffic and which sites have the highest conversion rates & use these as a guide when prioritizing where you spend your time, energy & money for your business. Taking the time to review these numbers last year & apply what I learned made 2015 the best year ever for my business! 

Do you currently use Google Analytics? If so, how do you feel about your year-end review of revenue, traffic & conversion rates? Is it what you expected? 

Conquer Your To Do List with HabitRPG

Today's guest post is brought to you by Tessa of Krmbal. Today she's sharing a tool that's great to help you keep on top of your to-do List and daily schedule.

Running a small business means there’s always something to do. It can be hard to stay on top of all the little things and making sure they get done. I've tried physical and virtual lists, I've tried posting a list with people who would keep me accountable, but nothing works as well for me as HabitRPG.

HabitRPG is an open-source program that treats your life like a role-playing game. It’s technically meant to help you build habits, which I think it does, but I think it’s much more powerful as a fun tool to help you remember your tasks and motivate you to complete them.

When you first sign up, you create an avatar, customizing it as you like. Later you can use money you gain from completing tasks to purchase armor and weapons for your avatar.


Then you create lists of your Habits, Daily Tasks and To Do’s. You can also edit your daily tasks to be done only on certain days of the week. You can also create tasks that are negative that you should avoid to hold yourself accountable. When you complete a task, you get points (or lose them if it’s a negative task) and at the end of the day, you may lose hit points based on whether or not you completed your daily tasks. You can also change the difficulty level of each task.

If you want the basic thing and getting points is enough motivation for you, then you’re basically all set. I’m that type of person, I wanted to mark things off and get points and level up and I didn’t really investigate any further when I first started using Habit. Then my friend Kelly from Craftypodes told me about the pets that you can collect as part of a feature of the game. Catch ‘em all, you say??? I was intrigued.

You can collect pets (and win the Beastmaster achievement if you collect all 90) by completing your tasks, which will randomly drop an egg, a potion or food. You can create a pet by combining an egg and a potion, each combination makes a different sort of pet. It turned out after Kelly told me to go look, I actually had some of each and was able to make some pets right there. Then, you can feed the pets and if you feed them enough, they turn into mounts your avatar can ride.


You can also get quests where you fight a boss monster and inflict damage by completing your tasks. You can join up with your friends and form a party to help defeat the bosses. Sometimes, they’ll have fun events where they’ll hold a worldwide quest to defeat a boss threatening Habitica. Once the boss is defeated, anyone who participated by completing a daily during that time gets rewarded. When a dragon threatened Habitica and was defeated, we all were rewarded with mantis shrimp pets & a mount! For Halloween & Thanksgiving all Habiticans got Jack-O-Lantern & turkey pets.


They also had fun things like costumes for Halloween and all the food for the pets had been turned into candy. You’re also able to choose a class once you hit a certain level where you can use special skills. I’m a Rogue, so I have skills that give me a higher chance of getting a random drop, more money or evade damage. The other available classes are Warrior, Healer and Mage and each has its own set of skills.

So far, it’s been a really fun way to make sure I get things done. Plus, it’s super useful as a business owner who has a very changeable schedule. Since I work as a freelance graphic designer as well as run Krmbal, my schedule can vary from day to day if a client contacts me and needs something done quickly. It’s nice to be able to have a To-Do List that I can add to and changes based on how long an item’s been in the list. HabitRPG color codes your tasks based on how long they’ve been uncompleted. For me, this makes it super easy to be able to keep track of what’s most urgent. You can also adjust each item's position in the list with a new update they've made, so you can put things in order if you work better that way.

For me, Habit works great. I've even added household chores to my habits list and I’m often motivated to go do one of them when I have down time because I might be rewarded with a random drop. I think it’s awesome that it’s totally customizable too. You add tasks that are relevant for you and decide if they need to be done daily, just once, or in-between. New tasks can be added as often as necessary and old things can be deleted if they're not relevant anymore. You can also use the app if you have a smart phone so you can add tasks or mark them complete while you’re on the go.

It’s a fairly simple program, but it can be an effective tool and it’s totally free. Plus, the developers are making it better and more fun all the time! So what are you waiting for? Head over to HabitRPG and check it out!


connect with Tessa

2015 Goals, plans & dreams

Happy Sunny-day, friends! It's my last day of vacation before I dive back into monster making full time. We've spent the day tidying up the house so we can ease back into our schedules and start on new goals and dreams for 2015 with a clean slate. 

Have you decided on any goals to work towards next year? I like to pick two big goals, one for my personal life and one for my business, to work towards each year. 
This year my/our personal goal is to have our basement finished. It will be used as a computer/gaming space for Trace, TV & toy space for G & in the back - a HUGE studio space for me, more than double what I'm currently using! Our awesome mother-in-law is going to draft the blueprints and we are going to contact a contractor after tax time to get some quotes. I'm so excited! Don't laugh, but here is the rough blueprints I made in Photoshop in my excitement, haha! 

The solid black lines are windows, and the outline in the top right is the entrance to the basement. We carved out an oversized room surrounding the water heater & furnace so in the future we could put in a half bathroom if we wanted to, since all the plumbing is right along that wall. I picked the back corner of because it gets the most light during the day, plus it's nice & tucked away! We have already been to IKEA to pick out storage cabinets to line the wall of the storeroom to hold my fabric & I have so many ideas for this space, I can't wait for renovations to start (and be done)!
My business goal for the year to reach 850 sales in my shop. I would also like to make 450 monsters total in 2015 - this year I made over 350 so I feel like this is an attainable goal. That is the equivalent of about 9 monsters a week so I feel like it's something I can definitely do if I eliminate distractions in my studio *cough Instagram cough* and really focus on sewing & meeting the small goals I set for myself each week. And to help with that,,,,
I have an accountibuddy! I have worked with some friends to set up an accountability partner program & I was paired up with the sweet Katie from Ribbons & Robots, a fellow toy maker. We have a lot in common so I am very excited to work with her on this - I think having a weekly chat with a friend to discuss goals, plans & progress will be super inspiring & motivating! We have already emailed a few times & it has me so excited for the new year! 
What are your goals/dreams/plans for 2015? Let's chat in the comments! 

Using the Etsy Promo Forums to Your Advantage

Hi, I'm Tessa & I make eco-conscious graphic tees at Krmbal. When I started Krmbal, I opened up on Storenvy because I work with a printer to make sure my tees are printed responsibly and the chemicals to make the screens and the ink are properly handled and disposed of (screen printing ink is actually considered hazardous waste until it's fully cured and I didn't want to be dumping any of that down a drain!). When Etsy decided to start allowing manufacturing partners and a friend sent me some free listings, I decided to try it out. The review process actually went very slowly for me, but eventually I was approved and could start selling.

I made a single sale in the first week I was on Etsy, but after that I had a long stretch of several months where I had no sales. I was really struggling to make the Etsy marketplace work for me and I thought that I might give up after my free listings were gone. I wasn't promoting Etsy on my social media because Storenvy doesn't take a percentage of my sales, so it just makes more financial sense to push all of my outside promotion to my custom Storenvy shop. I wanted to try to take advantage of the Etsy marketplace though because it is one of the really great features of Etsy.

I was averaging about 30-40 views a week on Etsy and 15-25 favorites a month. Those are pretty dismal stats. I tried changing up my search terms, even tried some outside promo just to see if boosting views would help me in the Etsy marketplace. Nothing really made a dramatic difference.

Then, my friend Danielle from Squshies mentioned that the Etsy Promo forums were open again and that she really enjoyed them last year as a way to promote and to find new things. I hadn't ever used the Etsy forums before, so I asked her a few questions and then I dove in.  You can find the Forums link at the bottom of the page from anywhere on Etsy. The Promo forums are the last topic on the page in the forums section.

Basically how it works is someone posts a thread topic like Blue Items or Halloween and in the first post may include rules to post in that topic. Sometimes the rules are that you can only post 1 item from your shop, sometimes it's to post an item and favorite a certain number of items from other people and sometimes there are games where you post something that matches a color in the last item posted or is the next letter of the alphabet. As long as you follow the rules of the post, you shouldn't have any problems.

I use HabitRPG to help me keep track of my To Do list, things I do often and daily tasks. I decided to make it a daily task to spend a short amount of time each morning posting to the Promo forums. I don't spend more than 10-15 minutes each day and my views and favorites went right up.

Then something awesome happened. I was found by an Etsy team that devotes 2 days a week to finding a group of shops with low sales and "attacking" them with favorites and/or sales. I made 1 sale that day and got over 100 favorites. The next day, I got another sale.  That boost really helped Krmbal get some traction on Etsy and I think they found my shop because I posted in the forums on a topic for shops with low sales.

The Sneak Attacks team definitely gave me a boost, but I've kept that momentum going for about a month now and I think that's all due to the Promo forums. I've more than doubled my monthly views and my favorites have gone from 15-25 a month to over 100. In fact, this week alone I had 2 days where I got as many favorites in one day as I used to get in a month. I've also been averaging a sale a week since the boost from the Sneak Attacks team. That's not amazing, but it's much better than I had been doing!

I still don't promote Etsy outside of the promo forums any more than I used to, so the increase in traffic is all from the forums and getting better reach thanks to those favorites. I think favorites are pretty key on Etsy, they seem to be what really help expand your reach. It's especially true now with the new home page featuring the recent favorites of your friends and other people you follow.

If you're struggling on Etsy, I'd give the Promo Forums a try. If you've never tried Etsy, but want to give it a shot, ask any of your Etsy seller friends to send you a link for 40 free listings (they'll get free listings too) or feel free to use mine.

Do you use the Etsy promo forums or others venues to promote your Etsy shop? What have you found to be most effective in marketing your Etsy shop? 

A New Marketplace for American Handcrafted Goods

I recently had the honor of interviewing Erica from aftcra & learning more about this marketplace for made in America handmade wares. I think this marketplace could be a great opportunity for seller's looking for a handmade, American made only marketplace. So join me in learning more about this site & the people behind it!


What is aftcra?
aftcra is a new handmade marketplace where you can buy and sell handmade goods made in America. Erica Riegelman is the President and Co-Founder of aftcra and the creator of the new handmade platform.


How did aftcra come to be?
When I was younger, my mom was an incredible artisan and would always be painting, or crafting or sculpting something fierce. She had a talent that I had wished I had. She also had something that most incredibly successful artists acquire … patience. Patience is not a strong suit of mine. Because of that, I never followed in her creative footsteps. But one characteristic I’ve always had is the mentality that I want to change the world. I’ve always wanted to make a difference; to make things a little better than they were yesterday.

The summer of 2011 I had a truly serendipitous collision of events in my life:

1. My mother was struggling to sell her wares with local boutiques wanting to take a 50% fee.
2. My corporate job (which I will still say to this day is a great place) had started to wear on me, control me and left me feeling discouraged and beat down.
3. I read an incredibly inspirational book about the importance of freedom in your life.
4. I found a minor weakness in an industry giant.

Within these completely unrelated experiences, I discovered an opportunity.

This was when I made the biggest decision in my life: do I do something to change my life or do I sit back and let others control my destiny. That serendipitous collision pushed me to create aftcra, an e-commerce marketplace just for American handmade artisans to sell their beautiful goods. We are focused on helping American artisans share their handmade products with the world. We aren’t some Silicon Valley giant. We are just us, a family in the Midwestern that loves the talent of makers and their handmade goods. And aftcra, she’s the new marketplace on the block, but she's growing. 

aftcra was finally released into beta at the end of 2012. In October of 2013 we exited beta with a more formal site. Once we exited beta we experienced a surge in artists and realized that we needed to make the site even better. Throughout the majority of 2014 we worked on developing a better site for a users. And in August of 2014 we launched the new aftcra - which has a sleeker design, better usability for shoppers and artists, and more features for all users.

Erica from aftcra
Who works at aftcra?
aftcra is a small family-owned business. We are headquartered in Milwaukee, WI with an office in Boston, MA. We have three family members that work on aftcra regularly, and a small tech team who is constantly working to improve the site. 


What does aftcra stand for?
When creating aftcra we wanted to select a name that had meaning behind it instead of something fun and completely unrelated. aftcra is an anagram for "a craft", meaning the skill it takes to create something out of nothing. We think it's a good representation of our talented artisans.

 
How many sellers currently sell with aftcra?
aftcra currently has over 800 aftcra artists and is growing quickly. We have artists in every kind of category and all different skills.
 

What is a piece of advice you'd give to someone who is considering starting a business?
Because of aftcra I feel a sense of freedom in my life. All that I can share with anyone who has ever thought about starting a company is the one line that I still say to myself when I am tired from a day’s work and dealing with the pressure of a brand new business: There are always a million reasons why you shouldn’t do something, and there is never a better time to start than right now.

Follow the aftcra movement:

Save Money on Postage & Keep Track of Packages in One Place with Shipping Easy

Today's guest post is brought to you by Toni from Little House Of Crafting


Of the multiple ways to print a shipping label, I've found ShippingEasy to be the most affordable and effective. It works in conjunction with a variety of different storefronts including, Etsy, Storenvy, & Ebay. The low down: 

 You can sync one ecommerce shop and purchase 50 shipping labels per month for free. 

You will need to set up an Edicia account for both First Class Mail and Expedited (Priority Mail) shipping. 

The only draw back is you must purchase a minimum of $10 worth of postage at a time through Encidia. Don't worry, you will use it!

I found ShippingEasy under the "Extras" tab on the Storenvy dashboard. After signing up for ShippingEasy and Endicia and syncing my store I was ready to go & it quickly became my favorite way to prepare orders for shipping, so I thought I would put together this little walk through to help others get started using it!

This is the order screen. You will see all of your open orders on this screen. 


Clicking on the down arrow will open up a drop down menu. From here you can create a shipment, edit the shipping weight, add notes, pick a quick ship option, etc. 


After clicking on "Create a shipment", you are taken to this screen. You will want to edit the shipping weight first. Then, choose your carrier (USPS, UPS, etc), choose your carrier service (First Class, Priority, etc.) and then the type of package. The prices will automatically adjust as you change the settings as long as you have your shipping weight updated. ShippingEasy will tell you if there is a cheaper way to ship your package based on weight and location. 

You can also change the shipping date as well. If you change your shipping date, when your purchase the shipping label, ShippingEasy will send an email to the customer letting them know that their shipment has been scheduled. I've gotten very nice feedback about this feature. My customers enjoy it very much! (You can turn off shipment notifications here.)


When you're ready to print your label click on "Add to Cart". You will be taken to the "Ready for Payment" screen. You can pay for multiple orders at a time.


After payment, it's time to print! Under "Settings" and then "Labels" you will want to customize your label printing. You can print two labels per page or you can print a label combined with the packing slip. You will want to do this for both Domestic and International labels.


After your label preferences are set, click on "Shipments" and "Ready to Print". You can print multiple labels at a time. This is particularly helpful if you choose to print two labels on a page. Click on "Print All" to print all labels. Otherwise, select the orders you would like to print, click on "Print Selected." Select what you would like to print:  Labels, Packing Slips or Labels & Packing Slips. Another window will open with the document. Ctrl+P or "File" and "Print" and you're ready to go! 

  
Other helpful information can be found by clicking on "Dashboard". Here you can see how many new orders you have today, how long ago you printed your last label, if you have any unshipped orders, your postage balances and your postage purchase history. 

 
On the left hand side of the screen, click on "Review Shipped Orders". Here you can check the tracking of orders and sort orders by destination and time. 


Also on the left hand side of the Dashboard, you can "Order Free USPS Supplies". This is where you can order Priority Mail Flat Rate envelopes and boxes.

That is a quick run down of ShippingEasy! Detailed plan and pricing information can be found here.

Will you be trying out ShippingEasy?